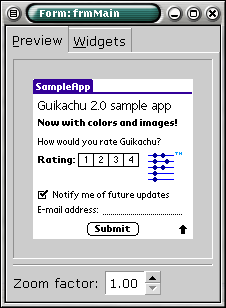
The form editor allows you to create forms in a WYSIWYG way. "Form" is the PalmOS terminology for windows: rectangular areas of the screen that hold related user interface elements, the so-called "widgets". WYSIWYG (What You See Is What You Get) means you can immediately see the results of your actions in a preview window showing you what the screen of the PalmOS device will look like.
 |
| Previewing a form while editing it in Guikachu |
You can use the zoom spinner to enlarge the simulated PalmOS screen. If the form editor window is too small to display all of the preview at once, scroll bars are displayed so you can pan around.
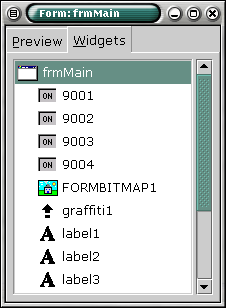
Click on the Widgets tab to display a textual listing of the widgets contained in the current form. This can be very useful for locating and selecting widgets in overcrowded forms.
 |
| Listing the widgets of the same form |
Each item of the list also contains an icon showing the type of the widget. The selection is synchronized between the widget list and the preview tab.
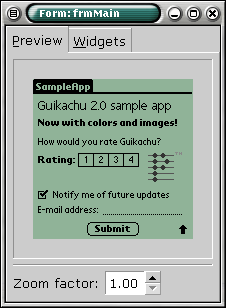
Depending on the screen capabilities of the target machine, the form preview will be displayed in either color or greyscale mode. In greyscale mode, color bitmaps are shown in greyscale, and widgets are drawn using the foreground and background colors set in the Preferences dialog.
 |
| The same form as above, in greyscale mode |
Just like a painter's palette, the widget palette is used to select what you want to "draw" on your canvas: the screen of the PalmOS device.
 |
| The Widget Palette |
Widgets available on the widget palette, from left to right and top to bottom, are:
To put a new widget on a form, first click on the widget's icon in the palette, then click on the preview window of the appropriate form. After the widget is created, the palette selection reverts to the "selection" tool. If you hold down the Ctrl key while clicking on the palette, the selected widget type becomes "sticky", i.e. it will not automatically switch back to the selector. Use this to place multiple widgets of the same kind on a form.
Widget operations such as moving or deleting are always done on the current widget selection. Selecting a widget also opens its editor window.
Click on the "Selector" icon to select widgets in the form preview. You can also use the widget list tab of the form editor window to change the selection. Clicking with the left mouse button selects the clicked widget and un-selects everything else. Press the Ctrl key while clicking to add/remove the widget to the current selection. This works in both the preview area and the widget list.
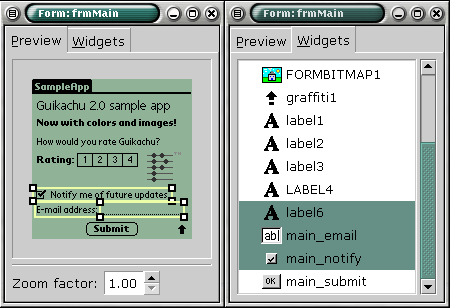
To select multiple widgets at one time, begin dragging the pointer with the left mouse button pressed, anywhere outside a widget. You'll see a rectangle showing the current area. When you release the mouse button, everything inside the rectangle will be selected. Again, if you hold down the Ctrl key, the widgets inside the rectangle are added to the current selection instead of replacing it.
 |
| Multiple widgets selected |
If the current selection is empty or doesn't include the widget you clicked to access an operation, the clicked widget replaces the current selection, i.e. if you begin dragging an unselected widget it immediately becomes the selected one.
In either the form preview or the widget list view, click on a widget with the right mouse button to pop up a menu of widget commands. As of version 1.0, this menu includes a single Remove item. Select this to delete the currently selected widgets from the project.
Select Cut or Copy from the right-click menu to put the selected widgets on the clipboard (and, in the case of Cut, to remove them from the current project). Right-click on a form in either the same project or another and select Paste to insert a duplicate of the widgets on the clipboard.
If more than one widget is selected, the right-click menu will also contain items to help you in lining up widgets. Each of these aligning commands will move the selected widgets to be on the same horizontal or vertical line.
When laying out your widgets on a form, it's often easier to visually modify the layout instead of manually entering position and size information into the property editor windows.
You can move widgets either by changing their X
and Y properties, or by dragging them around on
the form preview. Drag one of the currently selected widgets
with the left mouse button to move all of the selection. This
is useful for moving widgets while preserving their relative
positions.
Some widgets' dimensions are determined by their content: for example, a label's size will always be determined by the text it contains. The size of widgets like buttons, on the other hand, can be changed to make a widget smaller or larger than their automatic dimensions.
If you click on a resizeable widget, small grips are shown in its four corners, as seen on the screenshot below. Drag one of these handles to resize the widget in the given direction.
 |
| Resize grips shown for a selected button |
You can hold down the Shift key while resizing to keep the original aspect ratio (the relative width and height) of the widget. You can release Shift anytime during the resizing to get back to non-constrained resizing.
Clicking on a widget not only changes the selection: it also opens the editor window for the widget. Widget editors are just like resource windows, and contain the same types of property editors.
The only difference between resource editors and widget editors is that the latter are not popped up in separate windows, instead, there is a single property window shown for every form opened. Thus, when you edit a widget, its property controls replace the controls of the previous widget.
| Previous: Bitmaps | Index | Next: Resource Reference |